If you’re tired of having to babysit your grill or smoker during a low n slow cook, you’re going to enjoy the Minion method. This method is all about clever charcoal and wood placement to create a low and slow burn that takes care of itself.
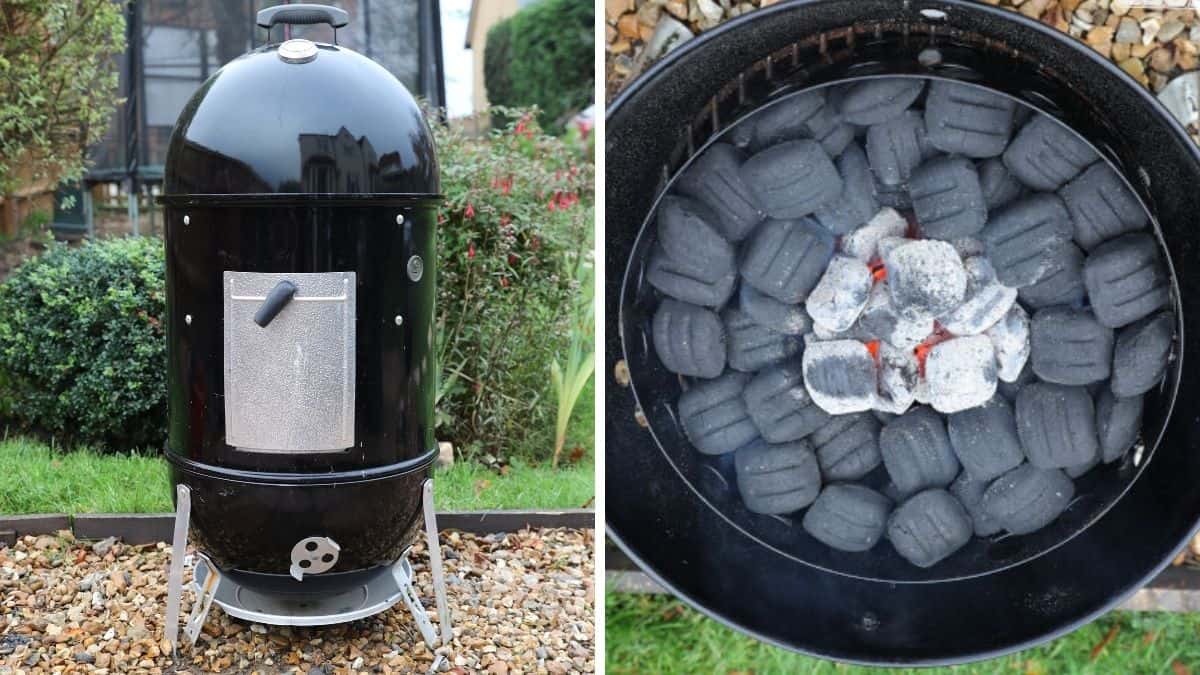
The Minion method was originally used with a Weber Smokey Mountain Cooker; however, it can work in any large grill or smoker. The fire and smoke can burn for hours, but how long exactly depends on the size of your grill or smoker and how much fuel and wood it can hold.
Overall, the Minion method is a relatively simple four-step process — and we’re going to show you exactly how to do it and what fuel works best.
Jim Minion is Credited With Creating The Method
Jim Minion was the first grill master who wrote about this specific technique. Minion was simply answering a forum question on how to control Weber Smokey Mountain temperatures.
Jim was explaining the particular way he builds his fire, and the name stuck, it became known as the Minion method.
You can read more about Jim Minion and his explanation here.
Why do We Use the Minion Method?
Tending to the fire during barbecuing is the key to success — you have to continually add fuel or rearrange the fire, which can be tiring and time-consuming.
According to Jim, the method was a bit of an accident. His wife had bought him a new grill for a competition, the Weber Smokey Mountain, to be precise. Jim had never used this grill before and didn’t have time to read the directions, so he proceeded to dump a bunch of briquettes into the barbecue. He formed a well in the center of the grill where he placed the lit briquettes.
The briquettes did exactly as Jim had hoped; they slowly ignited the other briquettes, which turned into a slow and even burn.
Everything seemed to work out perfectly for Jim that day as he took home the first prize with his chicken and second for the ribs — not too shabby for an untested fire control method and grill.
Video Overview of the Minion Method
We found a very helpful video to show you how to set up a smoker with the Minion method and thought it a good idea if you watched this short video, before we get into a detailed explanation of the technique.
Can the Minion Method Be Used in Any BBQ or Grill?
Although the Minion method was originally used in a Weber Smokey Mountain grill, many other grill masters across the country are using the technique in a range of grills and BBQs.
In saying that, the Minion method works best in smokers and grills with a deep firebox. If the firebox is too shallow, the coals and wood will be too close to the meat, and you won’t get a low and slow cook.
Another problem with a shallow firebox is that it has to be refilled often since you can’t use as much fuel at a time. This will result in heat loss and longer cooking time.
Now, although this method isn’t optimal in smaller grills, it’s not impossible. You can easily adapt the technique to fit your small grill by making a two-zone fire. Simply lay out your coals on one side of the barbecue and cook the meat on the other side, so it isn’t above the heat.
How airtight your grill or smoker is, is another crucial factor. An offset smoker with various leaking points will allow more smoke to escape and more air to come in, which will cause the fuel to burn faster. On the other hand, if your grill or smoker is airtight, the coals will burn more efficiently, giving you a much longer and slower cook.
Overall, the Minion method can work with any medium-to-large grill or smoker, but it’s ideal for larger models with a deeper firebox that enables you to load it up with coals. It’s not suitable for small grills as they simply won’t be able to hold enough coals and the meat will be too close to the heat for a low n slow cook
Lump vs. Briquettes: Which Is Best for the Minion Method?
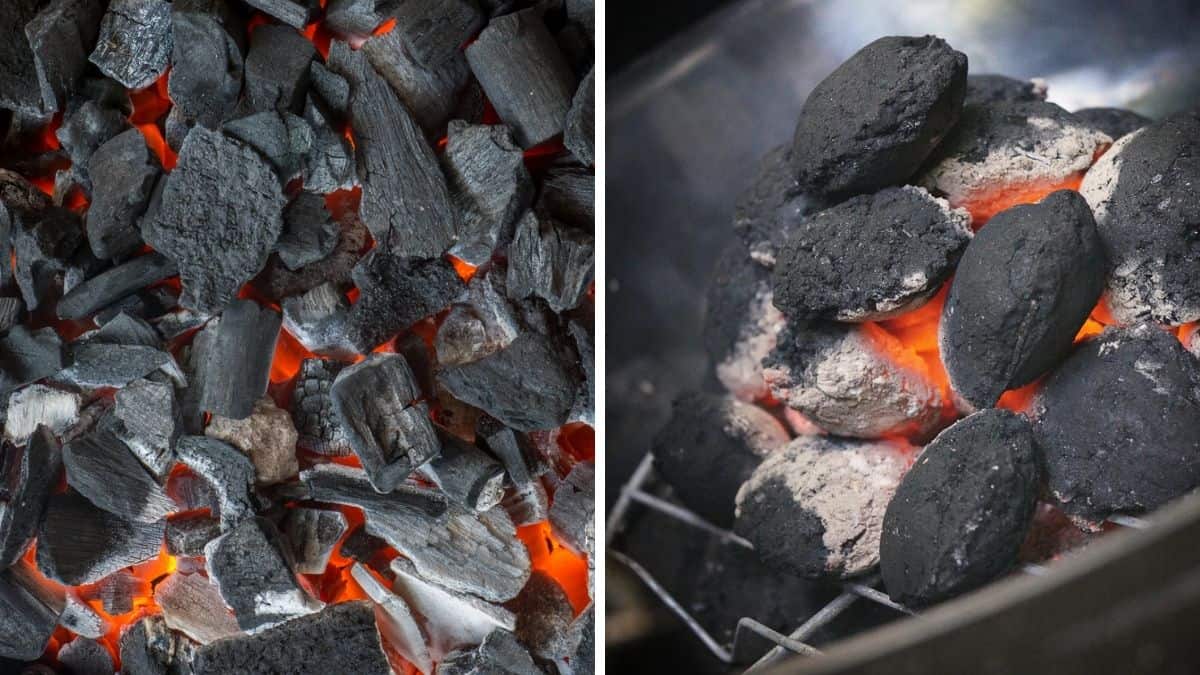
For the Minion method, lump charcoal or briquettes will work fine. But, the two fuels have their pros and cons.
Lump charcoal burns hotter and faster, meaning you’ll have to refill more often. Lump is also more natural, which means the pieces will vary in size. Due to this, you have to be more careful with how you place them in your grill by making sure they’re packed tightly; this will help the fire spread easier.
On the plus side, lump charcoal is cleaner and won’t result in as much ash as briquettes, making cleanup a bit easier.
Because briquettes are uniform in size, they burn more evenly and are easier to pack tightly within the grill. However, they do produce a significant amount of ash that you have to remove or it might smother the fire.
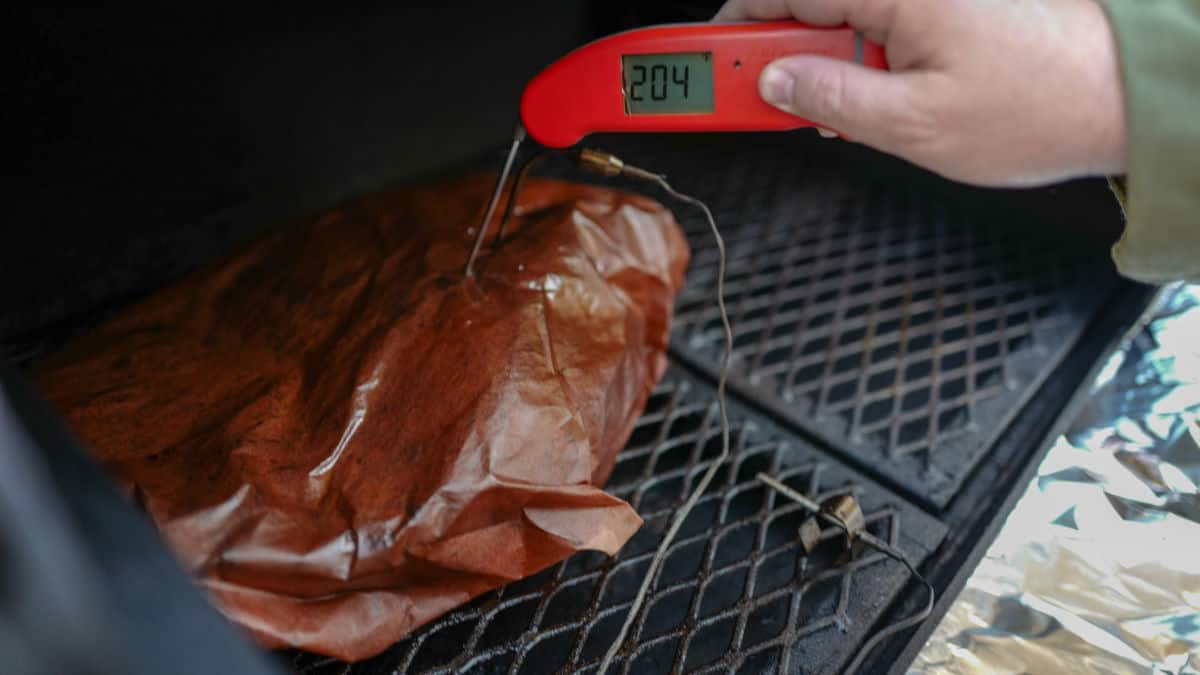
Both types of fuel will work for this method, but keeping an eye on the temperature using a thermometer is essential.
Don’t Unburned Briquettes Add a Chemical Taste?
Briquettes are a processed product where char is mixed with additional ingredients such as coal, cornstarch, limestone or borax. After being mixed, the ingredients are pressed into uniform sizes and shapes for an even and consistent burn.
Lump charcoal is basically wood that’s burned without oxygen present, leaving only carbon behind.
Because briquettes are a mix of various ingredients, some people do have concerns with how unlit briquettes can affect the taste of the food as they ignite during the cook. It comes down to personal preference — any additional ingredients found in briquettes are natural and won’t harm you or your food in any way.
The bottom line is that both lump charcoal and briquettes work with the Minion method, so choose what you feel the most comfortable with.
One thing you should always avoid is lighter fluid and pre-soaked briquettes. These will affect the taste of your food and even impart a chemical taste that is sure to ruin your cookout.
The Best Temperature Range for the Minion Method
The Minion method is ideal for low and slow cooking, and the temperature is generally anything between 225 and 275 degrees Fahrenheit.
It’s best for smokers where you use indirect heat with the fire away from the meat — it won’t work well if you’re planning on grilling up a few burger patties.
When to Use this Method
The Minion method works ideally for long and slow cooks that require an even heat for an extended period where the meat isn’t directly above the heat source.
In comparison, when you’re searing a steak or grilling burgers, you need high heat and a bed of scorching coals. Although the heat is intense, it won’t be long until the coals burn out completely.
Pros and Cons Compared to Other Methods
Another effective low n slow cooking style is the charcoal snake method, where you place your coals in the shape of a “C” along the wall of the grill.
Which method is best for you depends on your grill. With the snake method, you lay the charcoal in the shape of a “C” and light one end — it burns slowly similar to a fuse, burning less fuel as fewer charcoal pieces are lighting at the same time.
The Minion method requires more room compared to the snake method, as you really want to pack it with charcoal — so a deep firebox is ideal.
So, to conclude this: The charcoal snake method is ideal for charcoal grills, whereas the Minion method works best in deeper smokers.
Starting Your Grill Using the Minion Method
You can use one of two techniques to get your grill started Minion-style: The “Top Down” or the “Doughnut.” Both of these will keep the briquettes lit while slowly burning and igniting new briquettes as they come into contact.
The OG of the Minion method, and the way Jim did it was using the Doughnut. As the name implies, you simply add your preferred amount of charcoal to the grill and then make a well in the middle where you can add your lit charcoal.
Top Down is where you add a layer of charcoal in the bottom of your grill and then add the lit charcoal on top. The charcoal on the top will slowly burn and ignite the next layer, creating a slow and even cook.
To add some aromatic smoke to your cooker, simply place your split wood or wood chips on top of the charcoal.
The Minion Method with a Weber Smoky Mountain – Step by Step
After settling on the Doughnut or Top Down method that we mentioned above, it’s time to get your Minion fired up. This process should take about 15 minutes.
Add a Ring of Briquettes
Start by placing your unlit charcoal in an even layer at the bottom of your smoker or grill. If you’re using the Doughnut method, you should create a well in the center for the starter coals.
If you’re having trouble forming your doughnut, you can use a coffee can. Remove the two ends of the coffee can and place it at the center of the firebox or grill. Arrange your charcoal around the can, and once it’s time to load the lit charcoal, place them inside the coffee can and remove it using pliers or tongs.
Your choice of wood chunks or chips should be placed on top of the charcoal. These will slowly ignite and smoke as the fire spreads.
Light Some Starter Briquettes
Using a charcoal chimney starter is one of the fastest and cleanest methods of getting your briquettes going.
Simply add your briquettes or charcoal to the chimney and then light it using a Looftlighter, blow torch or a similar tool. You can also light it by placing a paraffin starter cube or two sheets of newspaper under the chimney and lighting it.
Watch the briquettes closely, and make sure all of them are 70 percent ashy on their surface before transferring them to the grill.
Add The Lit Coals to the Center of The Briquette Ring
Toss the hot coals into the center of the charcoal doughnut. Here, the briquettes will burn slowly, starting at the center of the grill.
If you’re using the Top Down method, place the briquettes on top of the first charcoal layer.
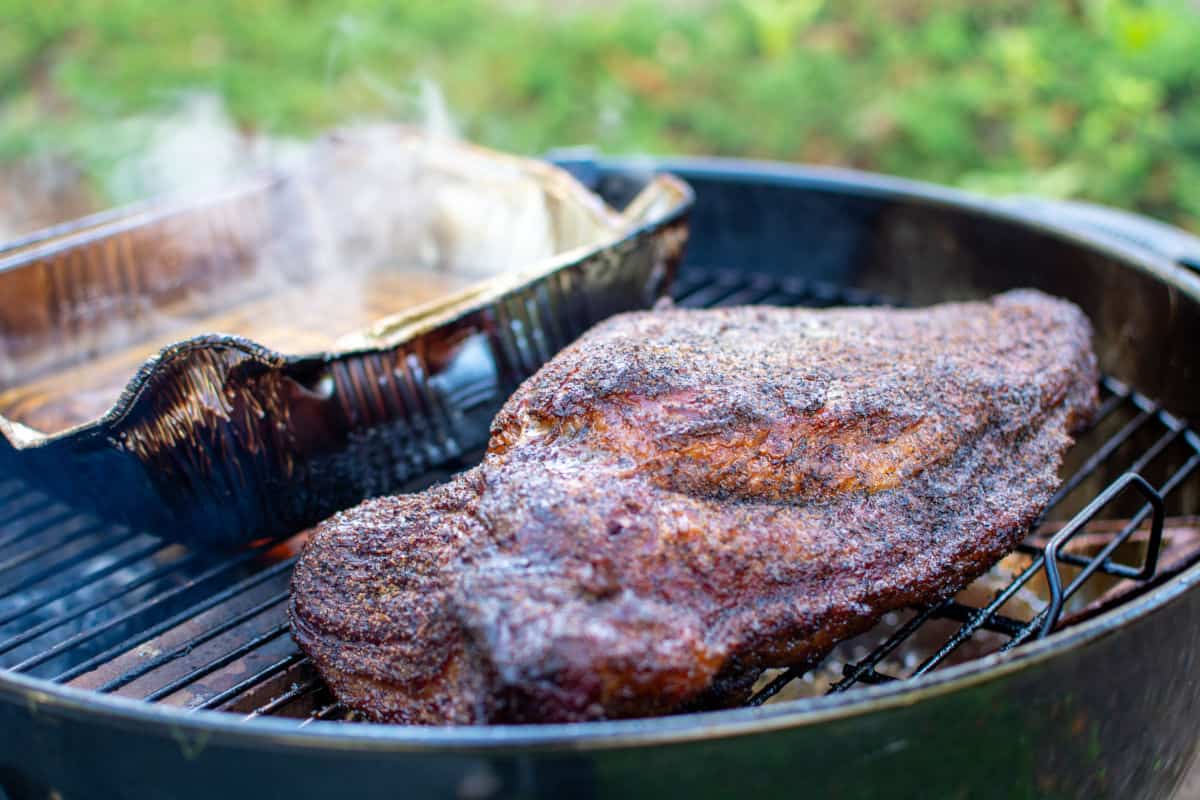
Finish Putting the WSM Together
The Weber Smokey Mountain grill has a water pan underneath the two first grill shelves. A water pan will help to add moisture as well as regulate the temperature.
Whether or not you need a water pan depends on your cooking method. Some require water throughout the process, others only halfway and some don’t need it.
The water pan should be filled with hot or boiling water. You should also check the water level throughout the cook (every two to four hours), refill as needed.
Tip – For dry cooking, you can wrap the bowl using foil for easy cleanup. If you want help to regulate the temperature, but don’t need the added moisture, you can fill the pan with sand and cover with foil. The sand will help to regulate the temperature similar to water.
Keep your top and bottom vents wide open at first. As the temperature slowly reaches 200 degrees Fahrenheit, close the top vents to 50 percent and the bottom to 25 percent. As the temperature rises, regulate it using the top vents only.
When the temperature reaches 215 to 220 degrees Fahrenheit, close the top vent to 25 percent and see where the temperature settles. If the temperature is too hot, close it slightly, but if it’s below 225 degrees Fahrenheit, open it slightly.
Only make small adjustments to the vent (about 1/8th increments), and give it 15 minutes to allow it to settle into the new temperature. This technique involves a lot of guesswork at first, but as you gain experience, you will be able to hit the right temperature quicker.
If you start to notice that the grill is running low on fuel, you can add more briquettes by lighting them in the chimney starter. Allow them to burn until they’re 25 to 50 percent ash, then add to the center of the grill.
Grilling and smoking require some creativity — and it will take some time and practice to learn what works and what doesn’t.
Experiment, Document, and Enjoy
The Minion method works — that’s a fact. Although it was founded by accident, it has become a trusted method used by grillers and pitmasters across the country to create a low n slow cook.
If you have yet to try the Minion method, what are you waiting for? Get out there, start the grill and let us know how it went by leaving a comment below.